Adding a new client account in ActionAtlas helps you organize and manage your client relationships efficiently. This guide will walk you through the process of creating a new client account step by step.
In This Article:
Step 1: Accessing the Clients Section
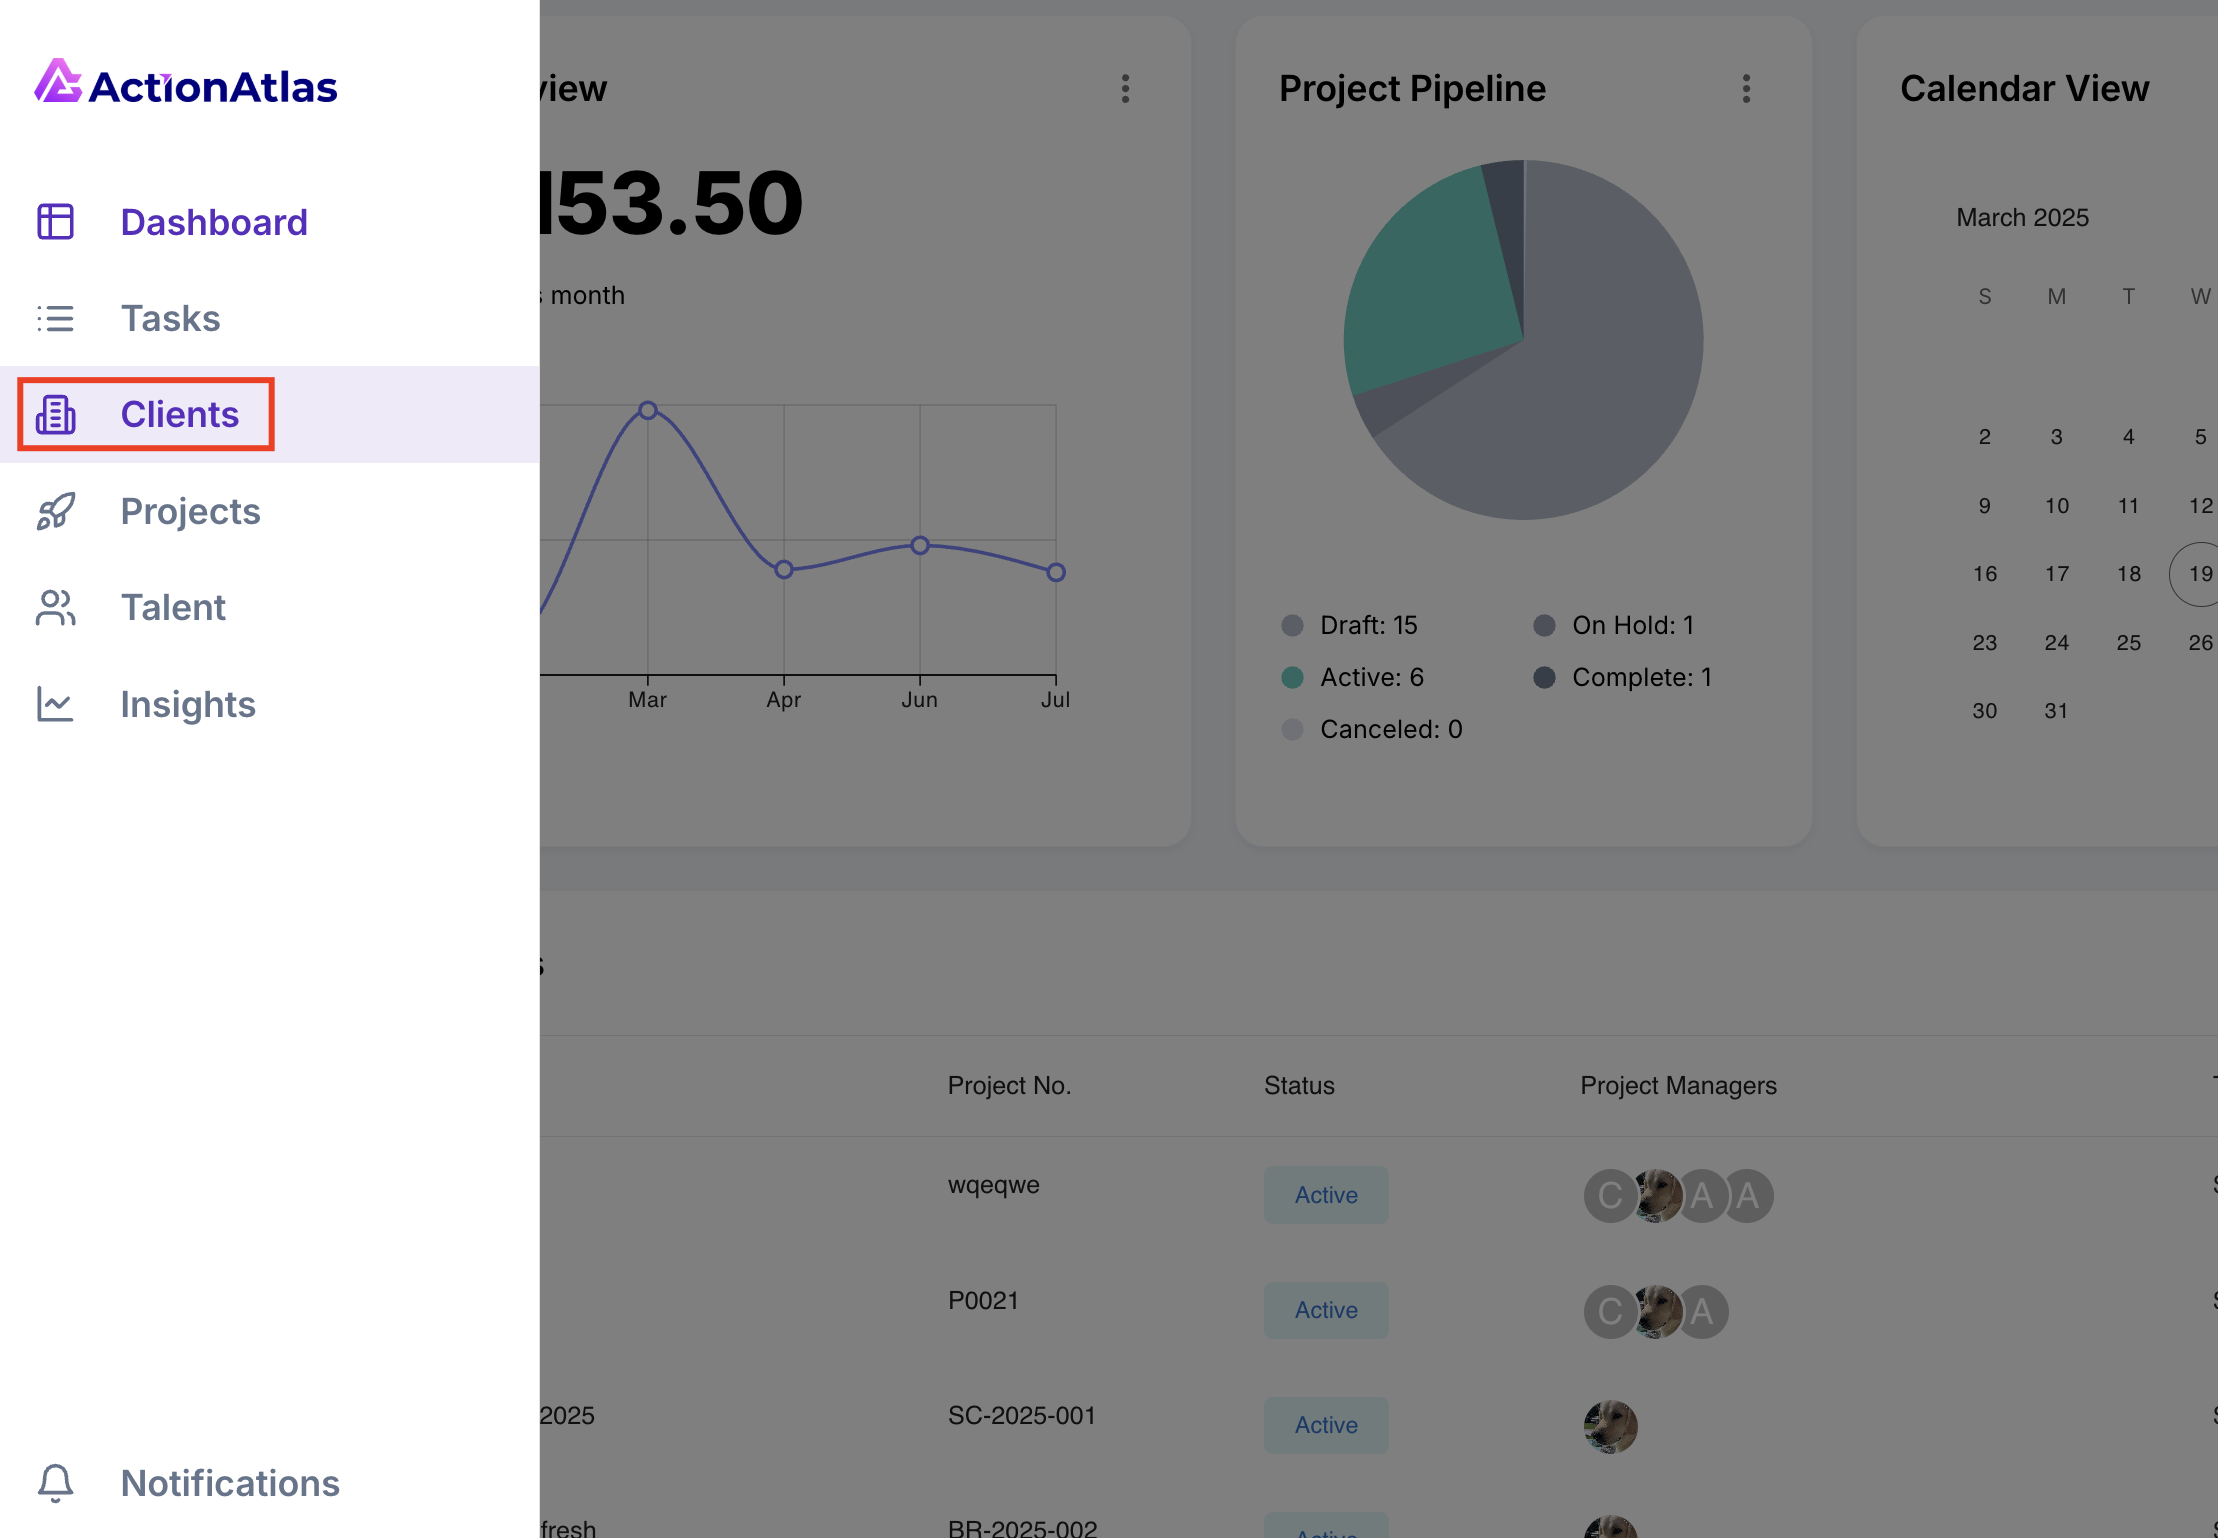
In the left-hand navigation menu, click on "Clients" to access the client management area.

Accessing the Clients section from the navigation menu
Step 2: Opening the Client Accounts Tab
Once in the Clients section, click on the "Client Accounts" tab to view existing clients and management options.
Note: Client accounts can be linked to Parent Companies if you have a hierarchical business structure.
Step 3: Creating a New Client Account
Click on the "+ New Client" button to start the creation process.

The New Client button
Step 4: Filling Out Client Details (Step 1)
Complete the client details form with all relevant information:
- Company Logo – Upload a high-resolution logo image
- Company Name – Enter the name of the client company
- Contact Name – Add the primary contact person
- Department – Specify which department the contact works in
- Email – Enter the contact's email address
- Phone Number – Include the contact's phone number
- Address – Enter the client's business address
- City – Enter the city name
- State – Select or enter the state
- Country – Select the country
- ZIP/Postal Code – Enter the postal code
- Industry – Select the client's industry from the dropdown menu
- Website – Include the client's primary website URL
Tip: Providing complete contact information ensures you have all necessary details for efficient communication with your clients.
After completing all fields, click "Next" to proceed to the additional information page.
Step 5: Adding Additional Information (Step 2)
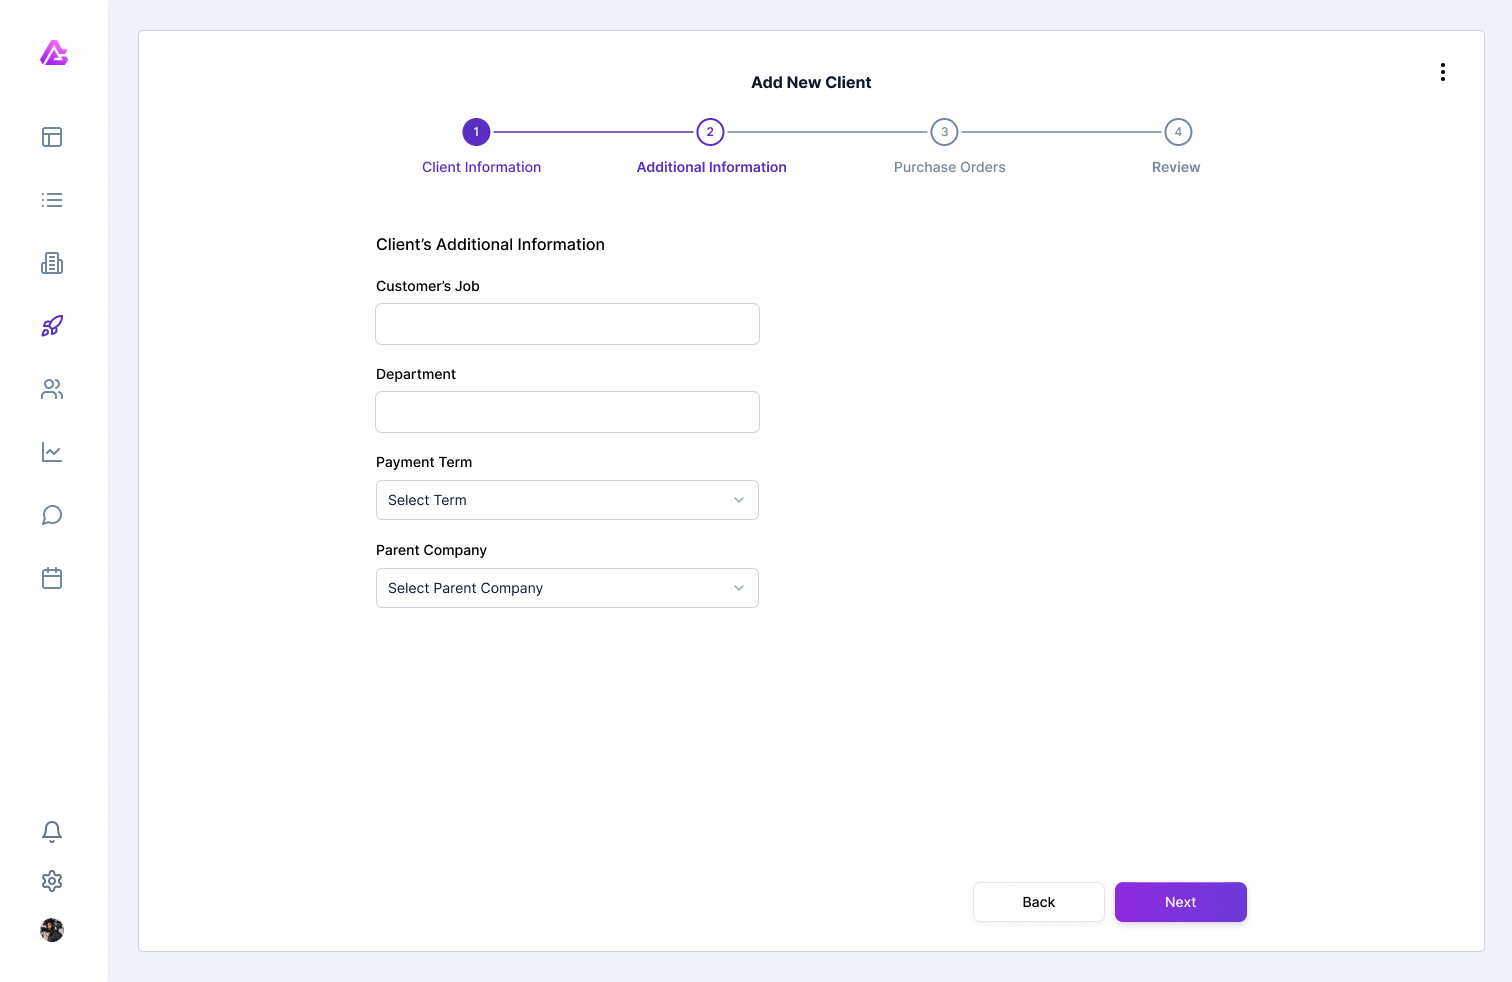
Fill out the additional client information:
- Customer's Job – Specify the client's role or position
- Payment Terms – Set the default payment terms for this client
- Contact Method – Select the preferred method of communication

The additional information form
Once you've completed this section, click "Next" to proceed to the review screen.
Step 6: Reviewing and Saving
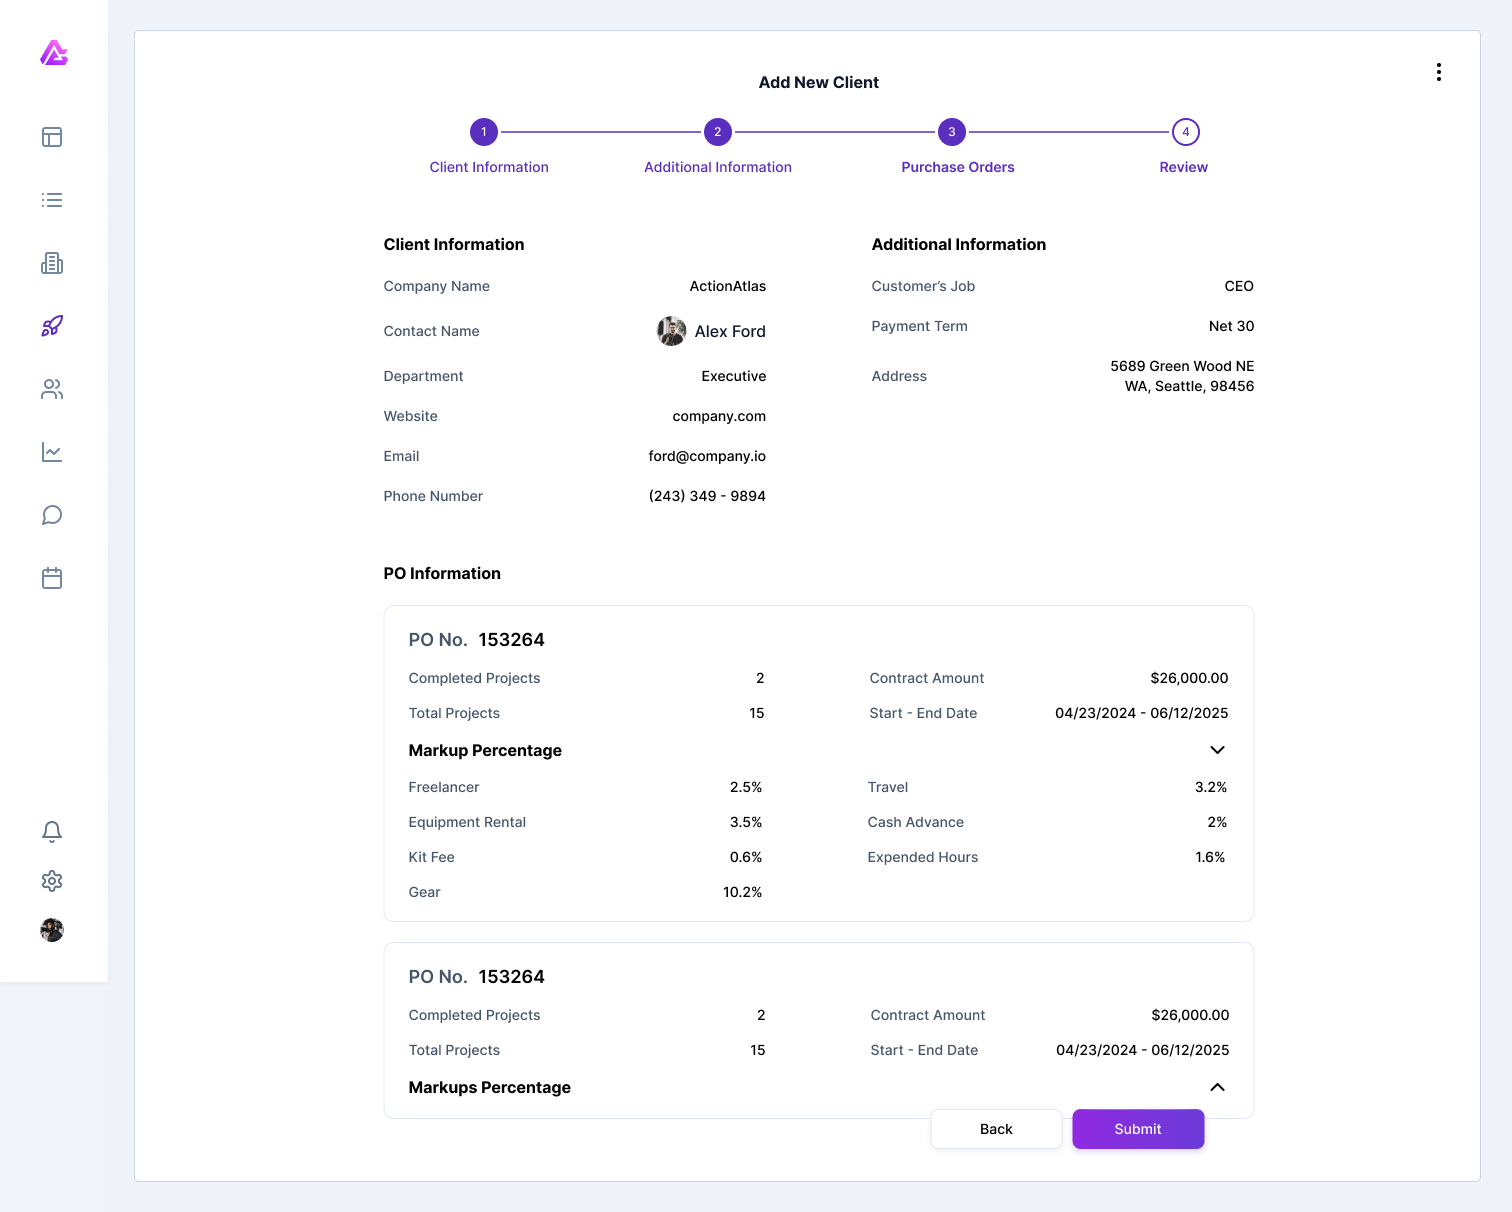
On the review screen, carefully check all the entered client information for accuracy.
Important: Verify email addresses and contact details carefully to ensure smooth communication with your client.
If you need to make changes, use the "Back" button to return to previous sections. When you're satisfied that all information is correct, click "Save" to create the new client account.

The client review screen before saving
After saving, you'll be redirected to the new client account page where you can begin associating projects and additional contacts.
Need Help?
Our support team is here to assist you with any questions about adding client accounts.
Contact Support