ActionAtlas streamlines the process of creating and managing projects for your clients. This guide will walk you through the step-by-step process of setting up a new project, from initial creation to final review.
In This Article:
1. Accessing the Projects Dashboard
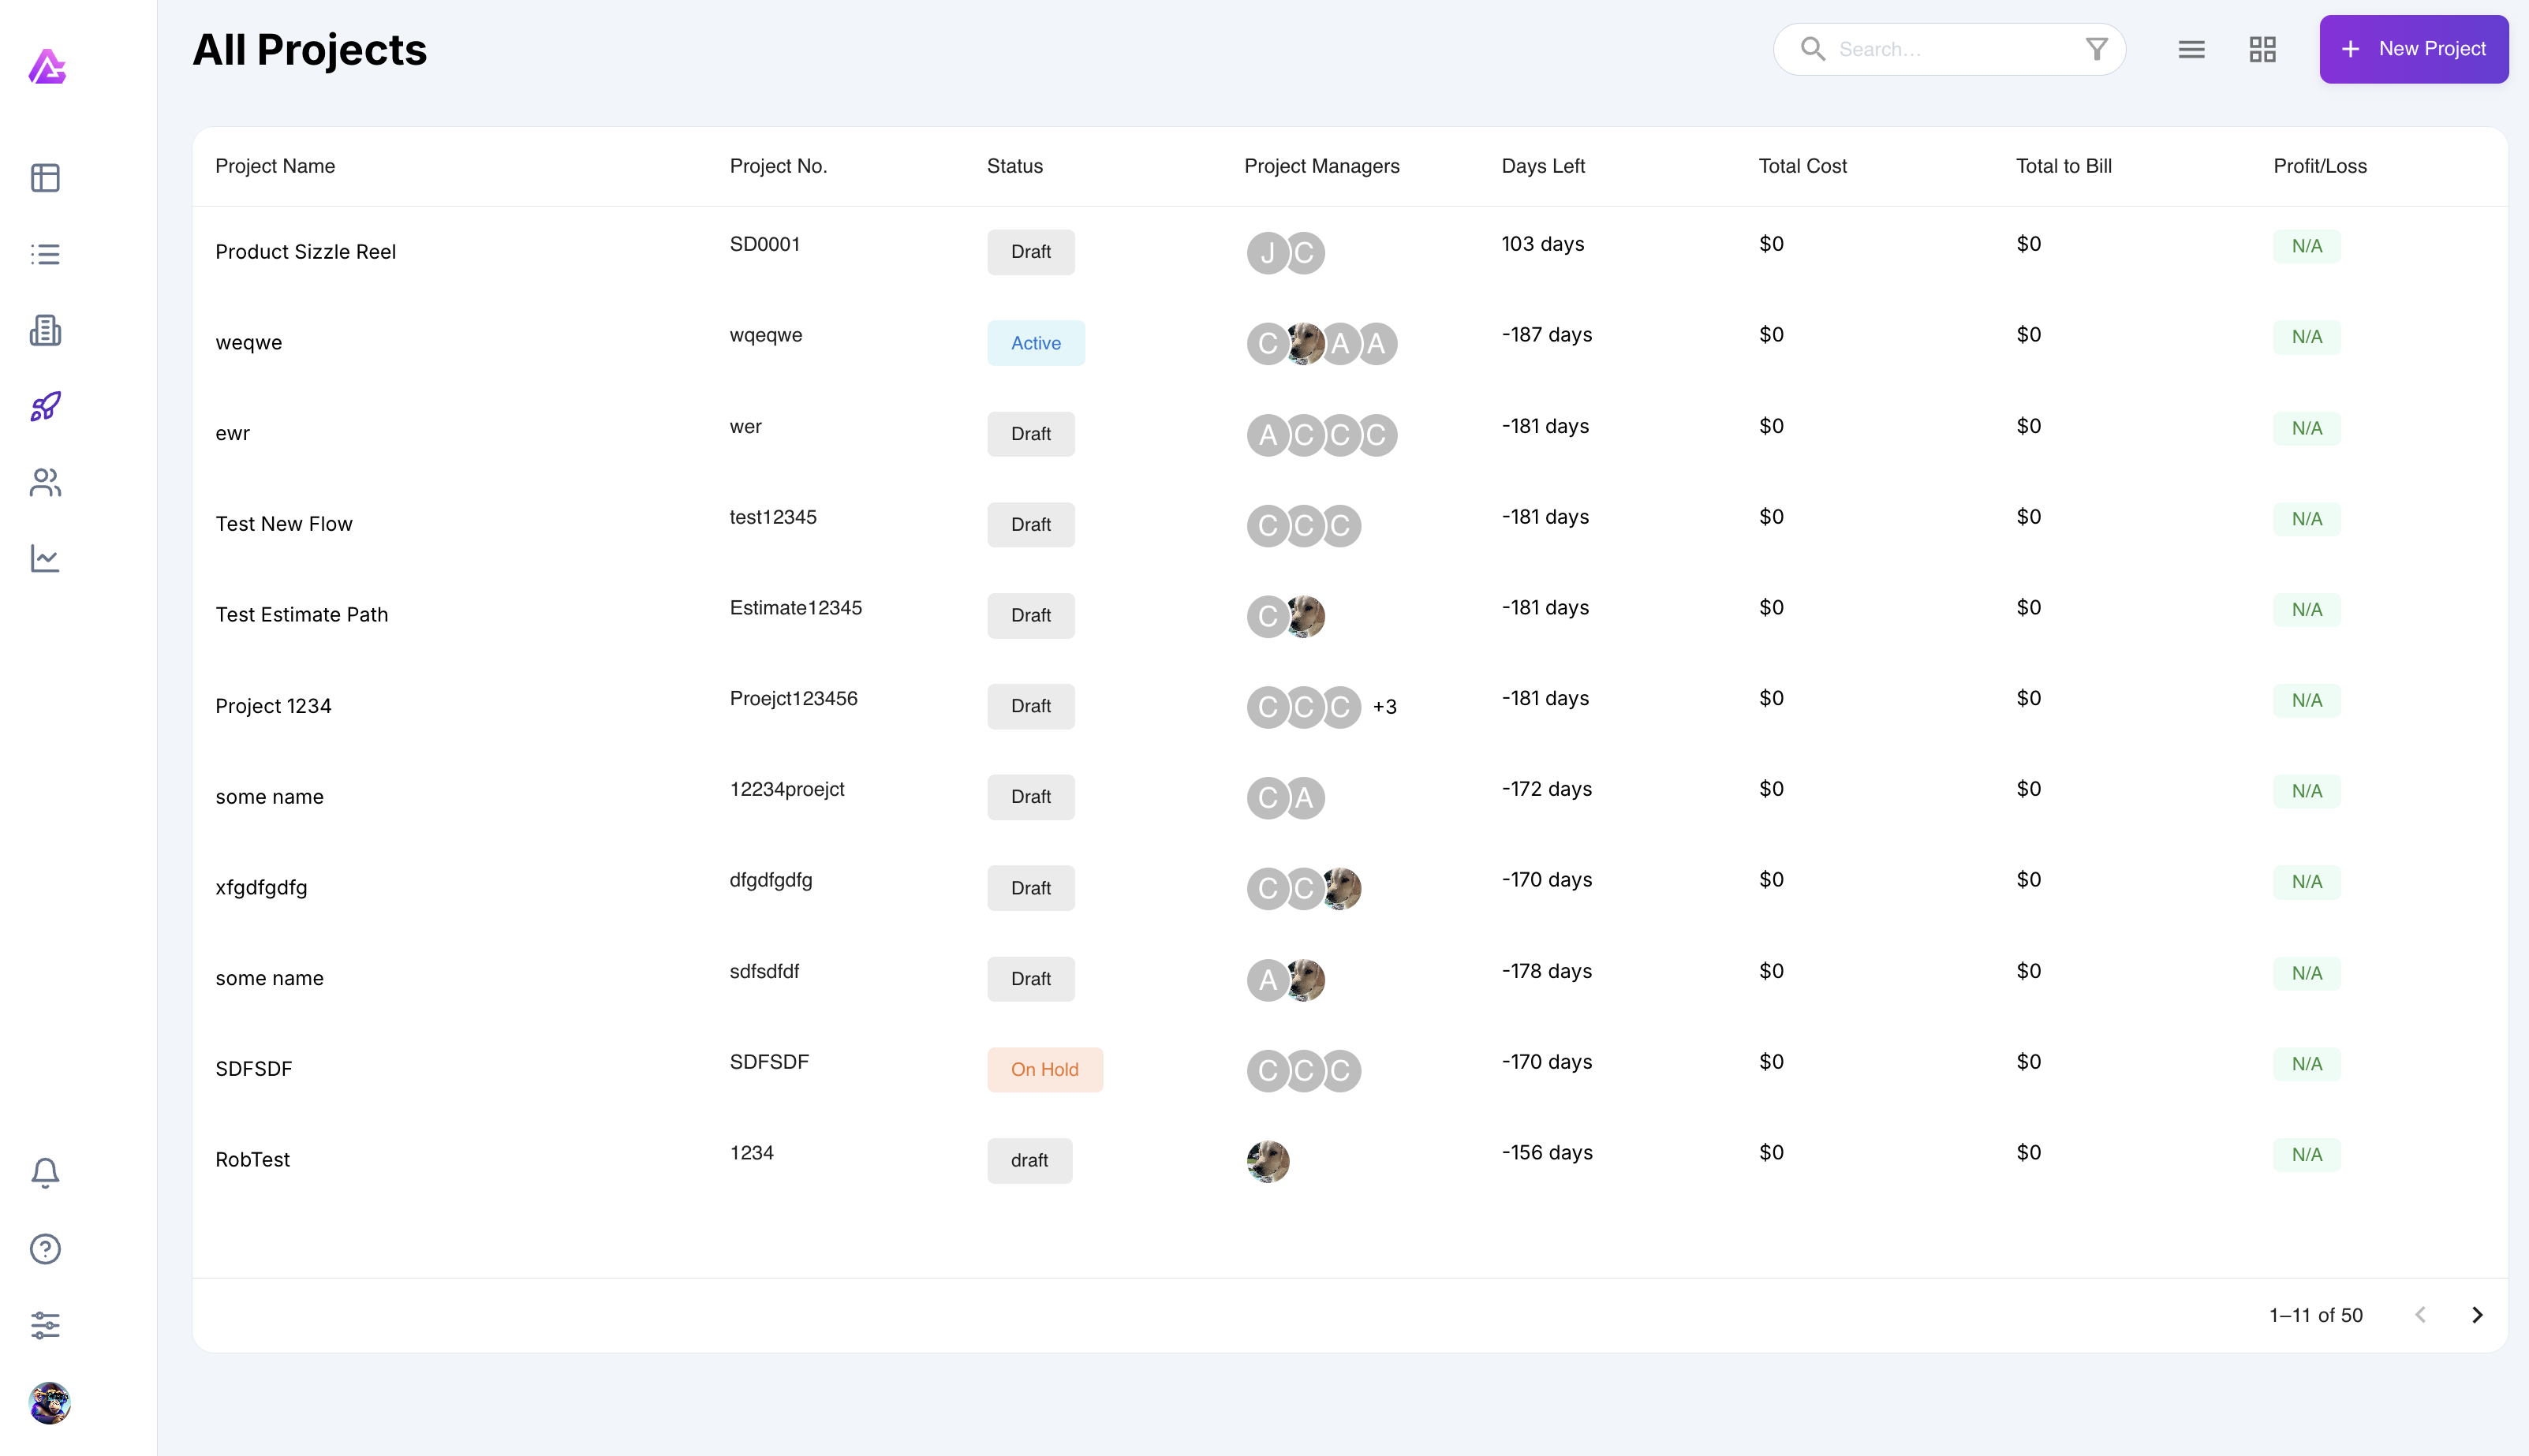
Log into the ActionAtlas application. From the main navigation menu on the left side of the screen, click on "Projects" to access the projects dashboard.

The Projects option in the main navigation menu
Note: The Projects dashboard displays all projects you have access to, based on your user permissions.
2. Starting a New Project
In the upper right-hand corner of the Projects dashboard, click on the "+ New Project" button to begin the project creation process.

The New Project button in the upper right corner
This will launch the project creation wizard that guides you through all the necessary steps to set up a new project.
3. Selecting Project Type
At this stage in the project creation process, you'll need to select how the project will be financially tracked. ActionAtlas offers two options:
Estimate
Choose this option when the project is based on estimated costs that will be tracked as the project progresses. This is ideal for projects with flexible scopes or when the final budget is determined by actual time and expenses.
Purchase Order (PO)
Choose this option when the project is tied to a specific client purchase order with predetermined budget caps. This allows for direct tracking against the PO amount.
Tip: For this walkthrough, we'll proceed with selecting "Estimate" which is the most common option for new projects. The PO option requires existing purchase orders in the client account.
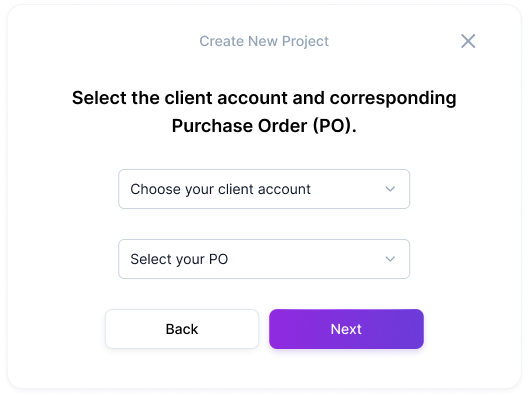
4. Choosing a Client Account
After selecting the project type, you'll need to choose which client account the project will be associated with.
- Use the search bar to find the desired client by name
- Browse through the list of available clients
- Click on the client name to select it

The client selection interface
Important: Ensure you select the correct client account, as this association cannot be changed after the project is created without administrative assistance.
5. Entering Project Details
The next step is to enter the core project information. The client account details will be automatically populated based on your selection in the previous step.
Complete the following required fields:
- Project Name – Enter a descriptive name that clearly identifies the project
- Project No. – Assign a unique project number or use the auto-generated one
- Details – Provide a brief description of the project scope and objectives
- Timeline – Set the project start and end dates using the date pickers
You can also add optional milestones to help track project progress:
- Click on "+ Add Milestone"
- Enter milestone name and target date
- Add additional milestones as needed
After completing all required fields, click "Next" to proceed.
6. Setting Up Project Coordination
The Project Coordination tab is responsible for some of the core functionality of the project, including team assignment and time tracking.
Time Tracking Configuration
First, determine whether time tracking will be required for this project:
- Required – Team members must log their time for all work on this project
- Not Required – Time tracking is optional for this project
Project Staffing
Assign key personnel to the project:
- Project Managers – Add one or more project managers responsible for overseeing the project
- Team Members – Add team members who will contribute to the project
Note: By default, ActionAtlas assigns project managers and team members to their default skillset and hourly rate when added to the project. These can be adjusted later in the "Talent" tab of the project settings.
Location
Select the primary location where the project work will be performed. This helps with resource allocation and reporting.
After completing all fields, click "Next" to continue.
7. Resource Management & Budgeting
The Resource Management tab allows you to set financial parameters and budget constraints for the project.
Overtime Settings
Determine whether overtime hours are permitted for this project:
- Allowed – Team members can record overtime hours on this project
- Not Allowed – Overtime hours are restricted
Freelancer Expenses
Specify whether freelancer expenses are permitted:
- Allowed – External freelancers can be utilized for this project
- Not Allowed – Only internal resources can be used
Budget Configuration
Enter a budget amount for the project. If the project doesn't have a predetermined budget, you can leave the value as "0" and ActionAtlas will build the project's cost as work progresses.
Important: Budget settings affect reporting and alerts. Setting an accurate budget enables ActionAtlas to provide alerts when projects approach or exceed budget thresholds.
After configuring these settings, click "Next" to proceed to the review page.
8. Reviewing and Creating the Project
The final step presents a comprehensive review of all the information you've entered for the project. This is your opportunity to verify all details before the project is created.
- Review the project type, client association, and project details
- Verify team assignments and project coordination settings
- Confirm resource management and budget configurations
- Make any necessary changes by clicking the "Back" button or the specific section tabs
Once you've confirmed that all information is correct, click the "Create Project" button to finalize the project creation.
Tip: After creating the project, you'll be redirected to the project dashboard where you can further customize settings, add tasks, and begin project execution.
Need Help?
Our support team is here to assist you with any questions about creating new projects.
Contact Support